Techniques
Step by Step Techniques.
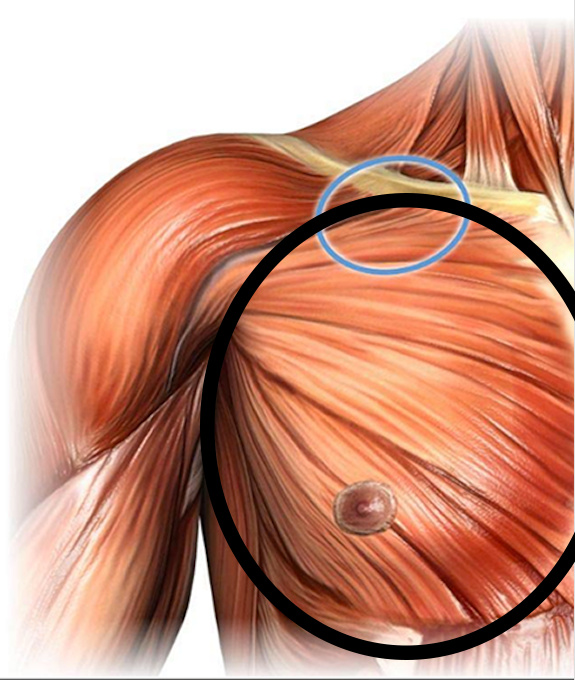
Step 1 :Marking the limits of the working area
Mark the limits of the chosen area that you wish to reshape with Endopeel.
-upper limit : the infraclavicular fossa
-internal limit : the sternal line
-external limit : the anterior axillary line
-lower limit : the submammary fold
The Anatomic Lines
The Anterior Axillary Line
External Limit of the Work Area

It's the imaginary line that runs down from the point midway between the middle of the clavicle and the lateral end of the clavicle.
The Sternal Line
Internal Limit of the Work Area

Sternal line is an important reference line on the anterior chest wall, which extends along the lateral border of the sternum, on both right and left sides.
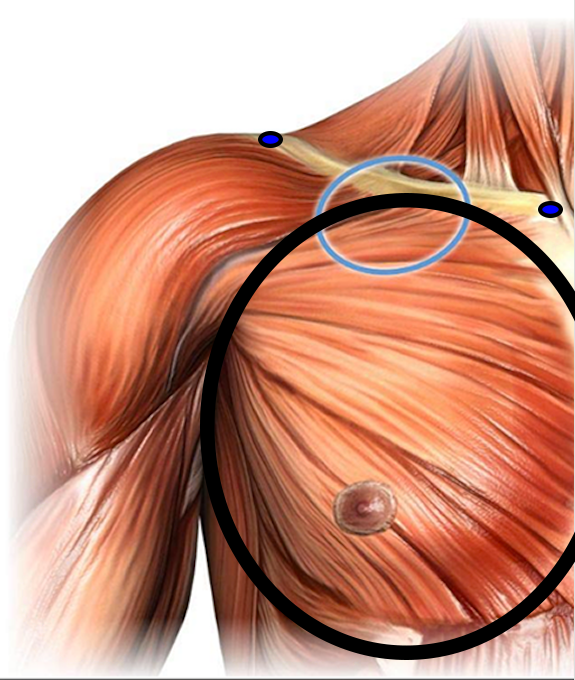
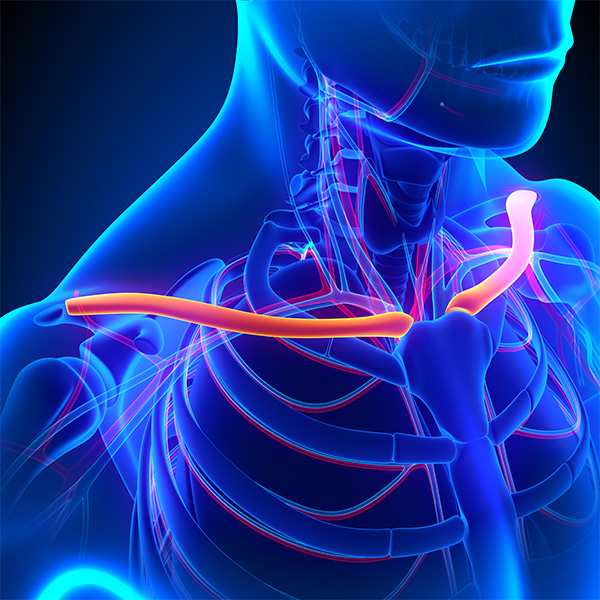
Step 2 : Marking the sternal and acromial end of the clavicle
Mark the 2 ends of the clavicula
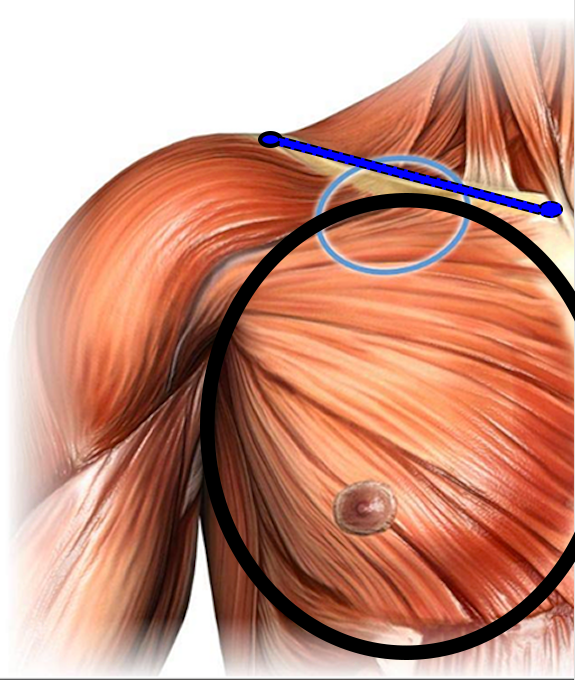
Step 3 : Draw a line between the 2 ends of the clavicle
Draw this line with a wooden tongue depressor and use a centimeter to measure this ,, clavicular line,,
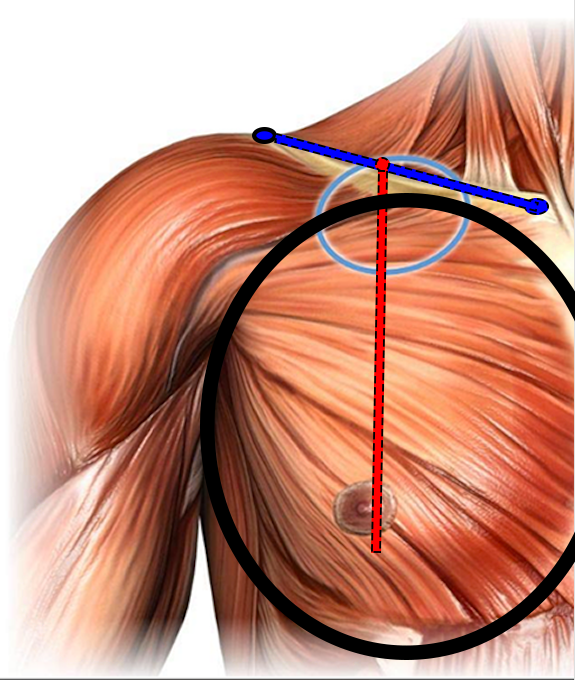
Step 4 : Draw a vertical line from the middle of the clavicle
The vertical red line must end at the bottom contour of the work area
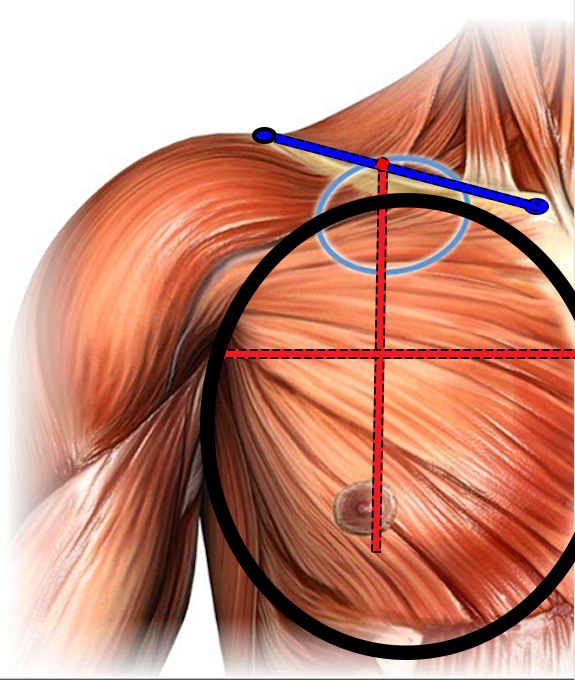
Step 5 : The ,, red horizontal line,,
-
Draw an horizontal line going from the base of the axillaris hollow on the work area ( with the arm at 90 grades the deltoid finishes on its internal part.)
-
Other method : this horizontal red line should separate the clavicular and sternocostal heads from the pectoralis major, adapting it to be horizontal
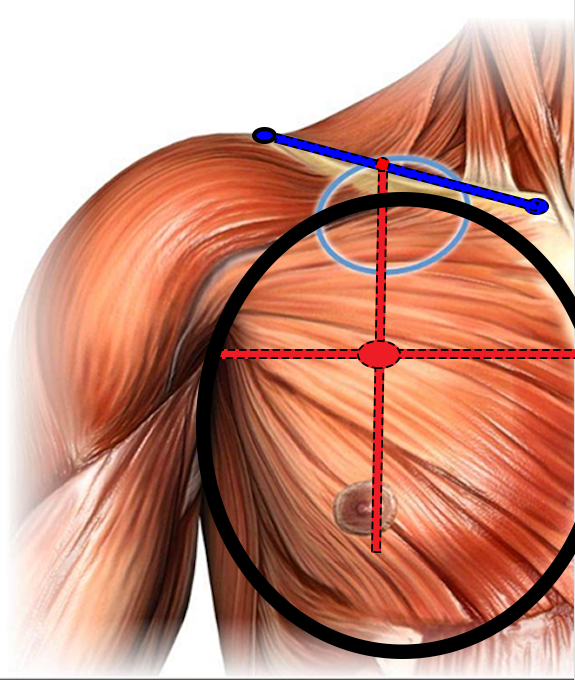
Step 6 : Mark the point of intersection between the vertical and horizontal red lines.
-
This point of intersection has no anatomical correlation.
-
It corresponded 5 years ago as the point of maximum projection of the pectoralis.
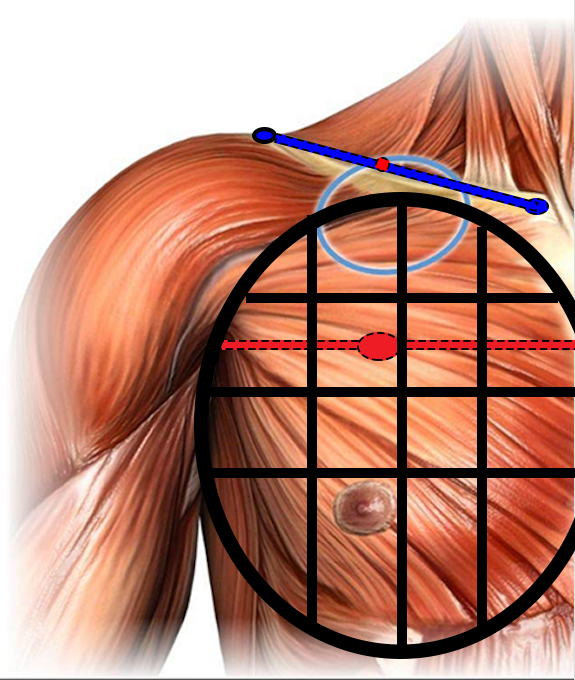
Step 7 : Division of the pectoral working area into quadrants
-
Divide the pectoral work area into quadrants with verticals starting inward going out and horizontals from bottom to top.
-
The distances between 2 lines equal to 2 times the width of the standard tongue depressors
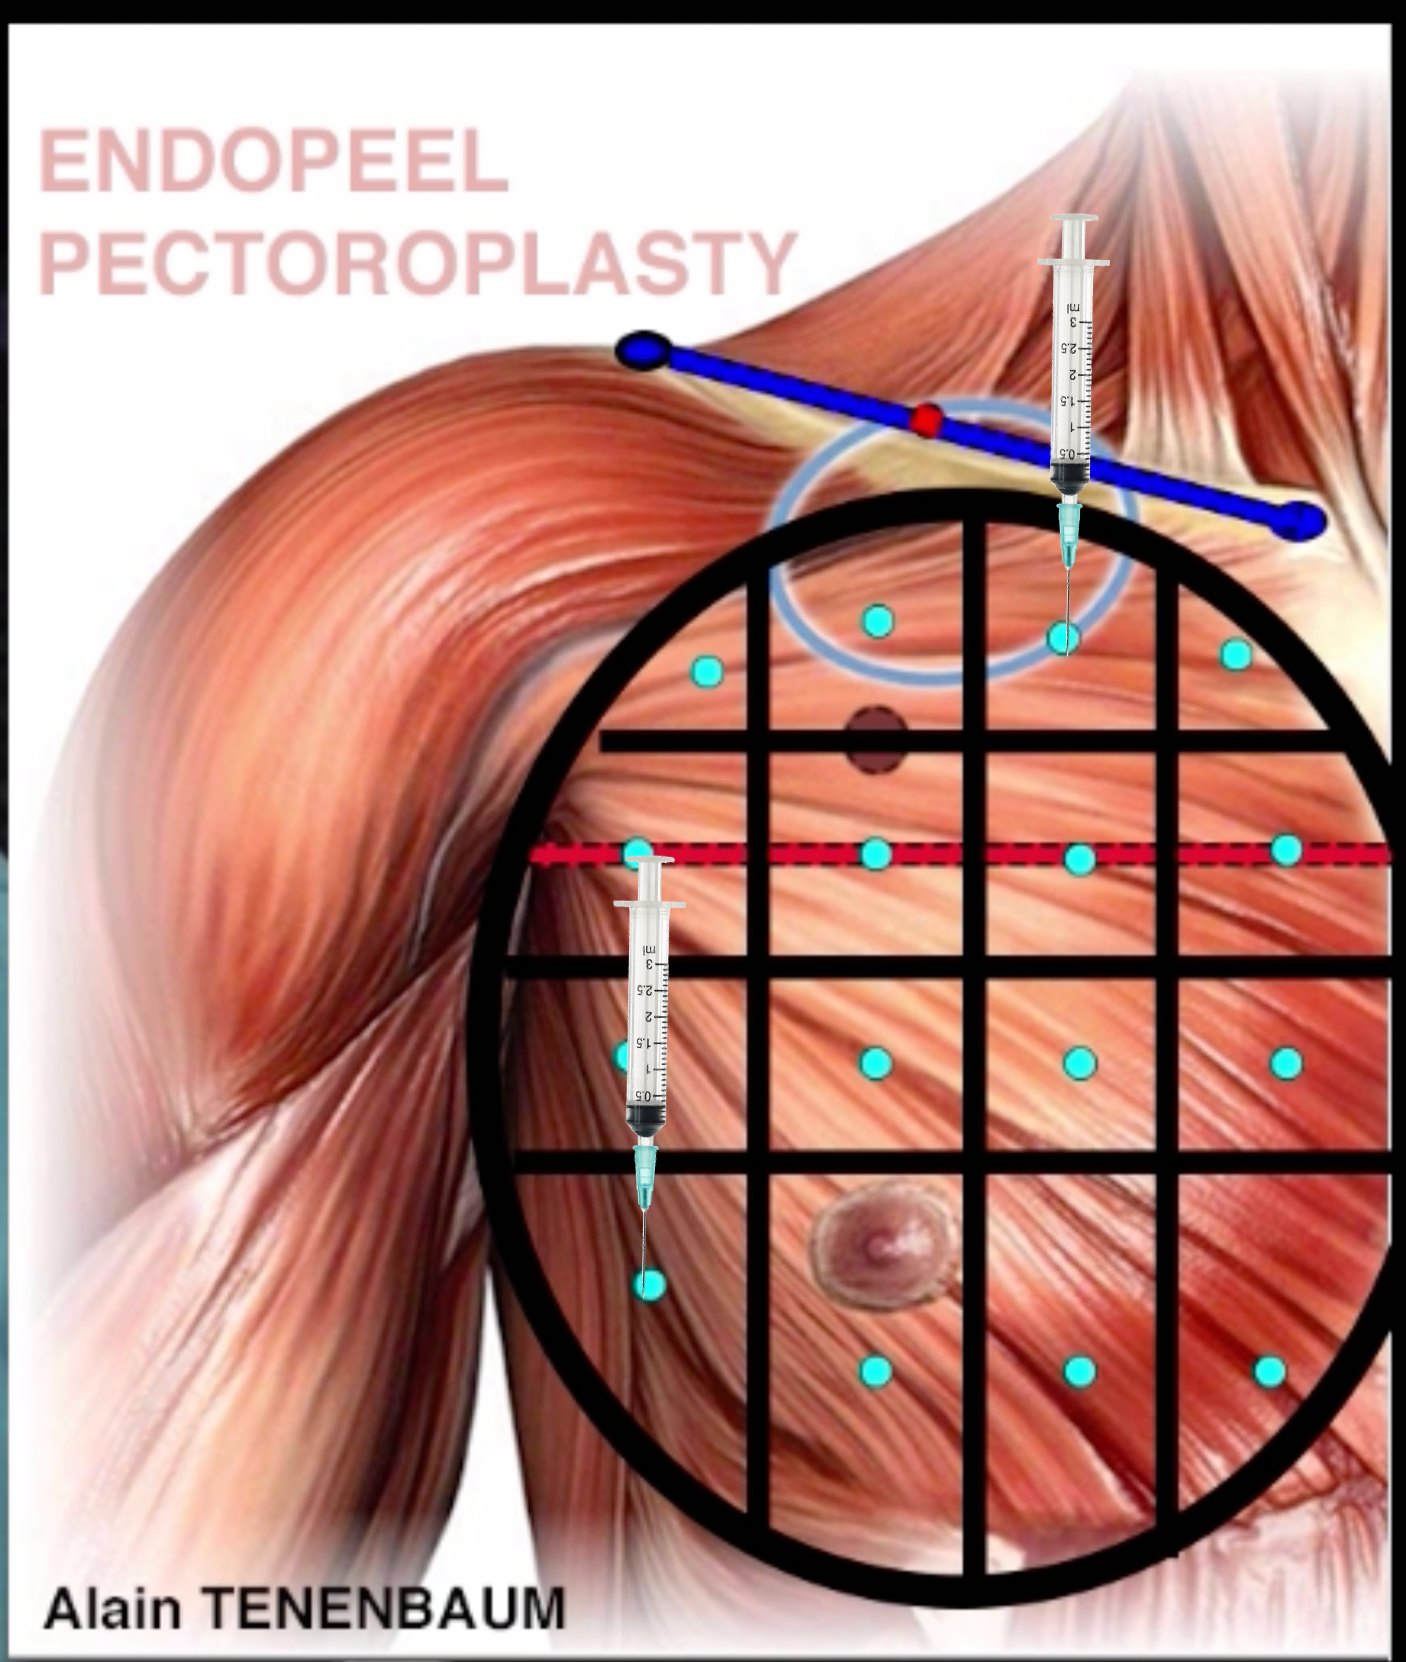
Step 8 : Vectors
-
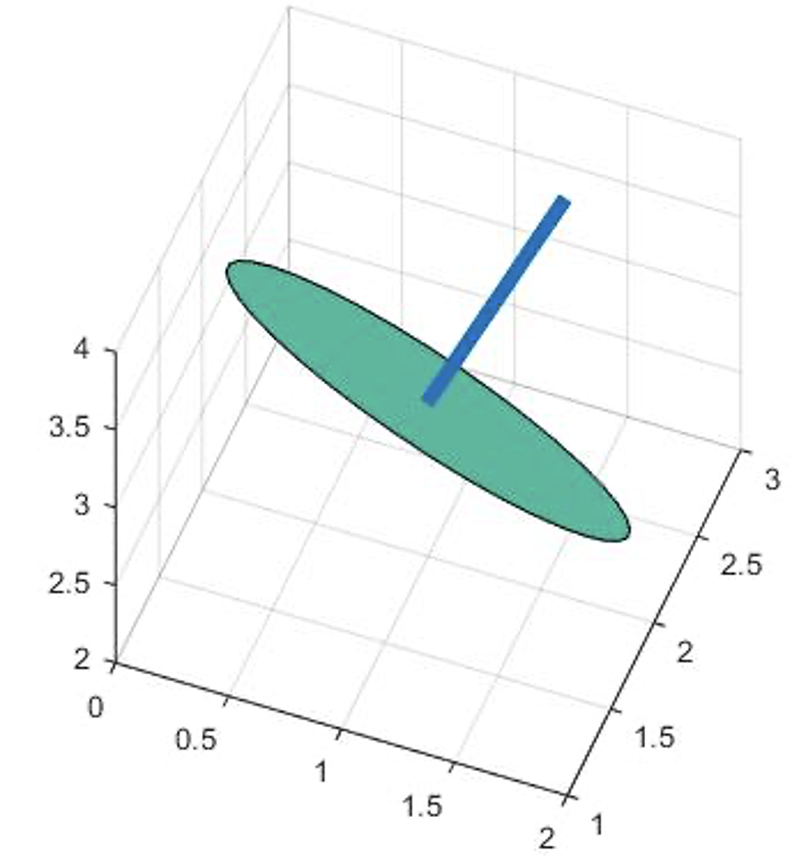
You need to apply vectors normal to the center of each square , avoiding the areola with a minimum of 0.1 ml .
-
For bigger squares, the quantity of product should be > 0.1 ml.
Vector normal to the center of an unit-area
Step 9 : Marking the tensors
-
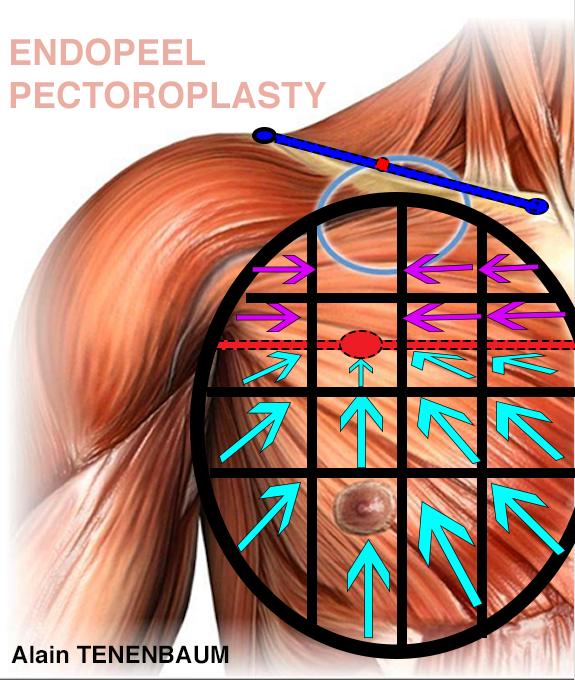
The tensors ( here arrows) look towards the old projection point with a direction and a sense of lifting+tightening under the red horizontal line and only tightening without lifting above the red horizontal line. For each tensor, you need to apply 0.1 ml minimum.
-
Bigger quantity of product is applied if the square is bigger
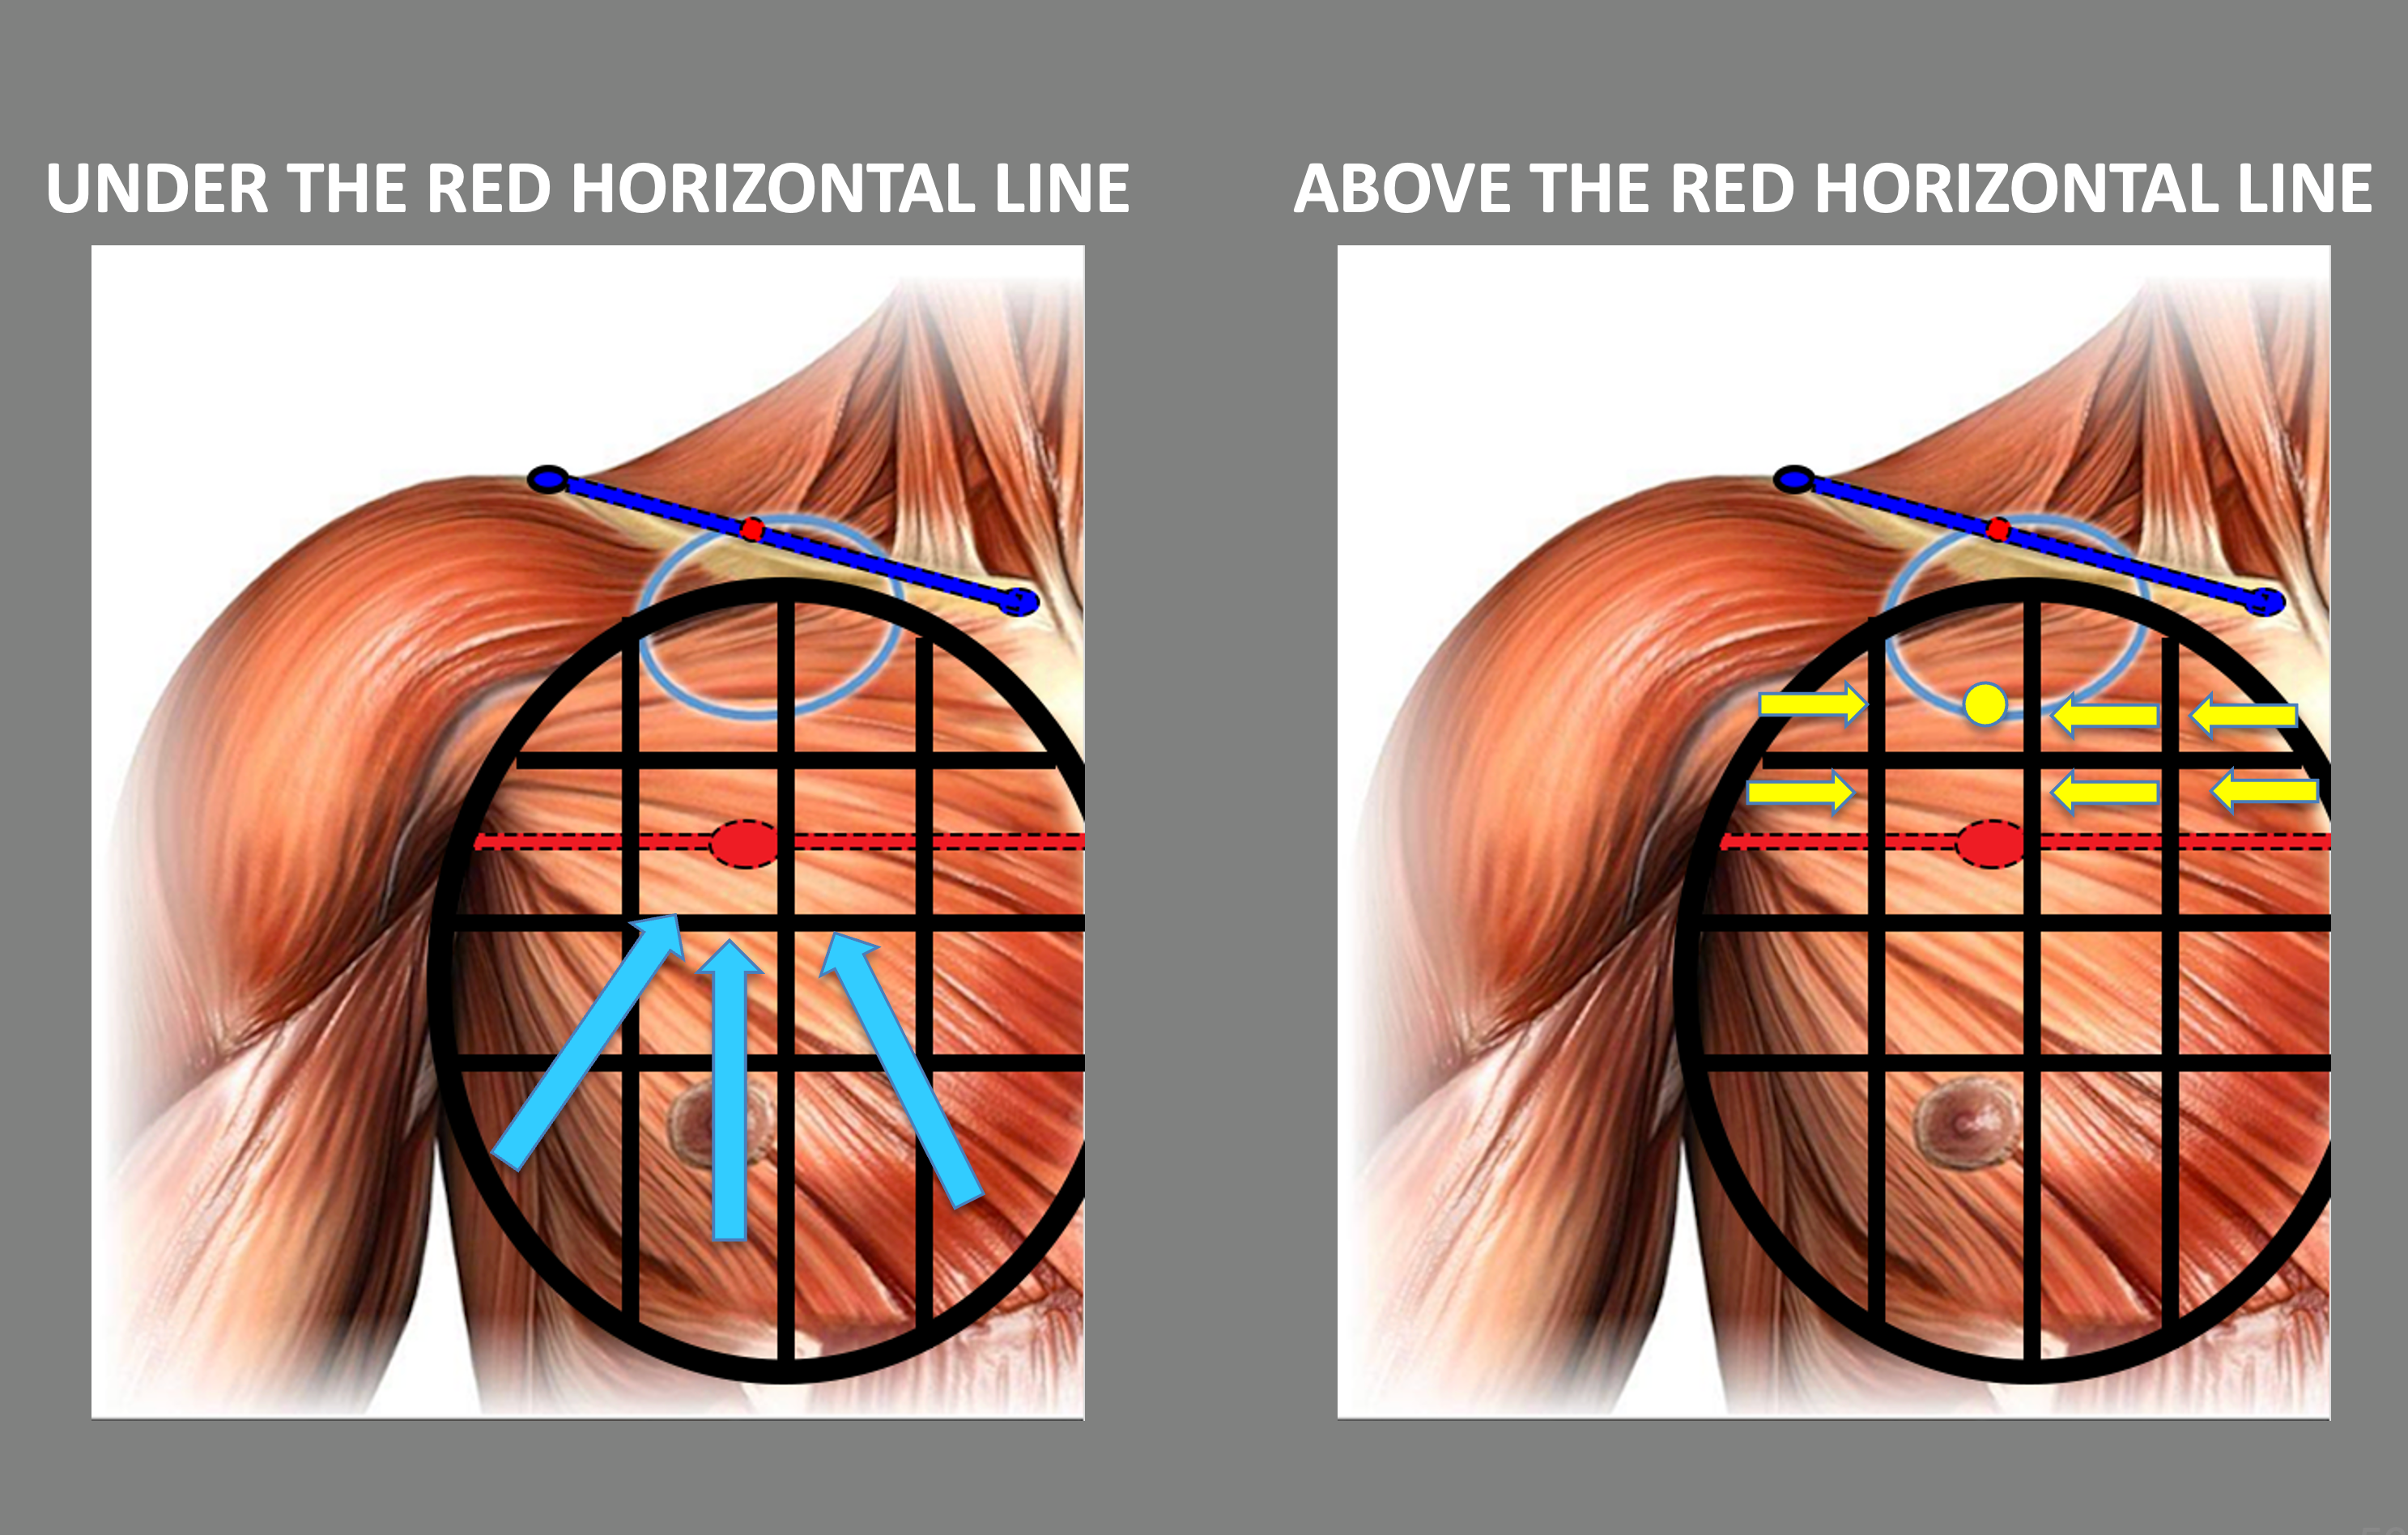
Step 10 : Importance of the red horizontal line
- Under the red horizontal line, all tensors are oblique, looking up towards the old maximum projection point.
- Above the red horizontal line, all tensors are strictly horizontal looking at the new maximum projection point .
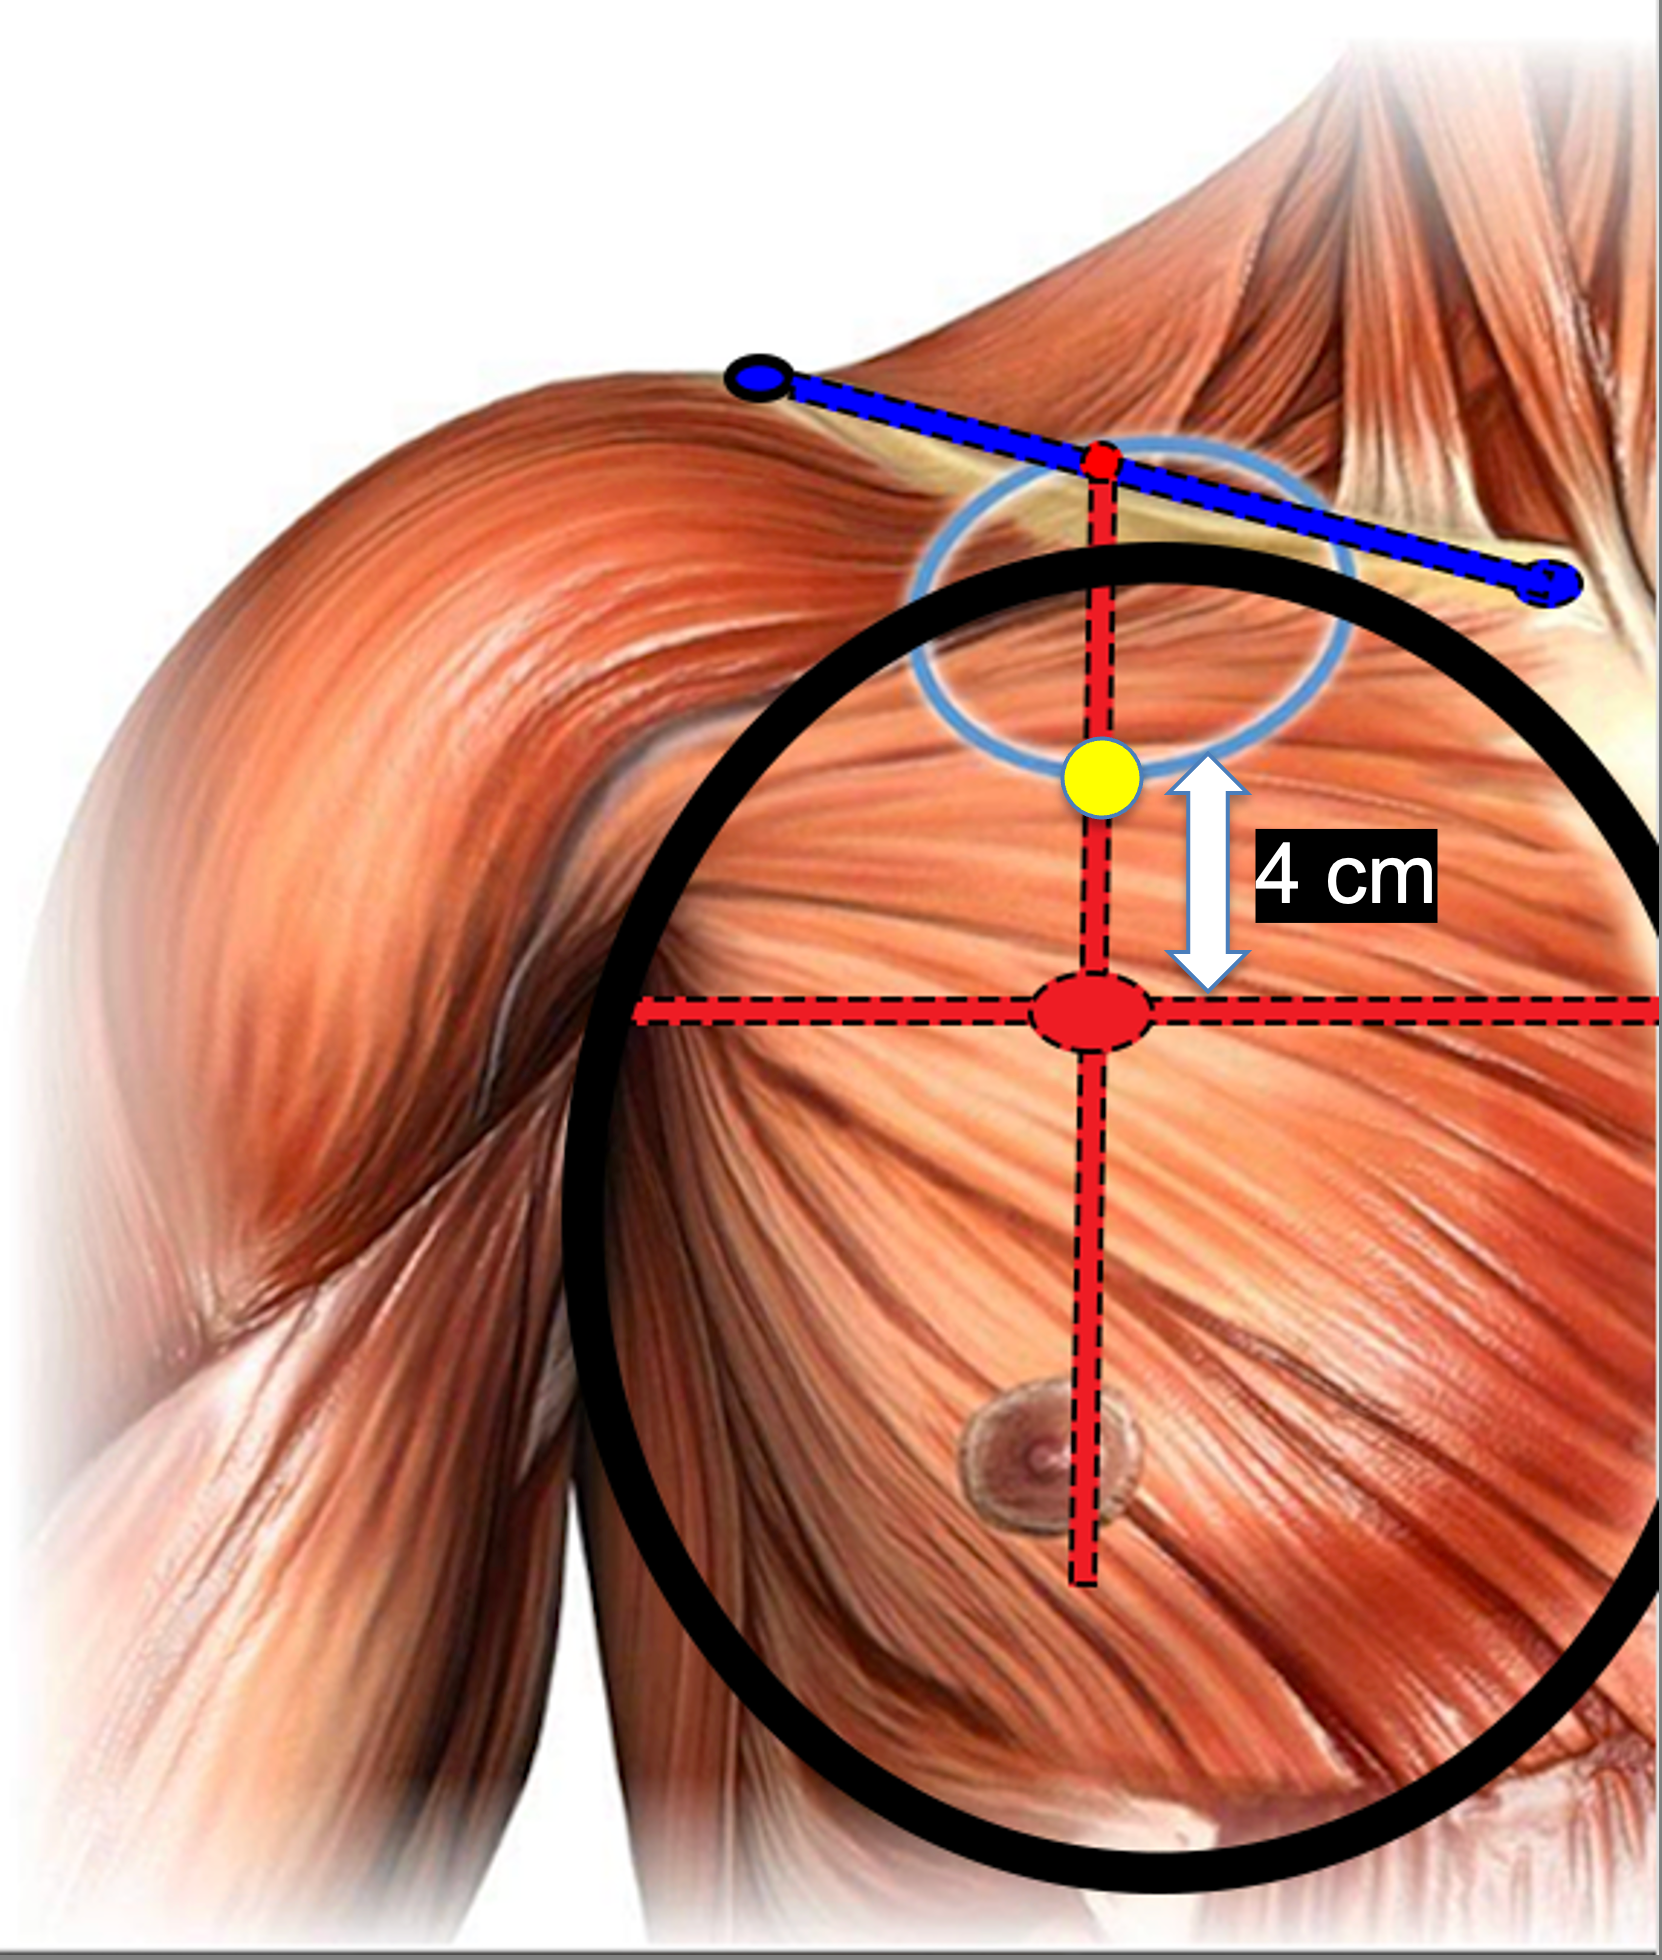
Step 11: Marking the new maximum projection point
Fashion style changes mostly twice a year .
Since 2019. dued to fashion new trends, the maximum point of projection is now 4 cm above the older one , on the same vertical line.
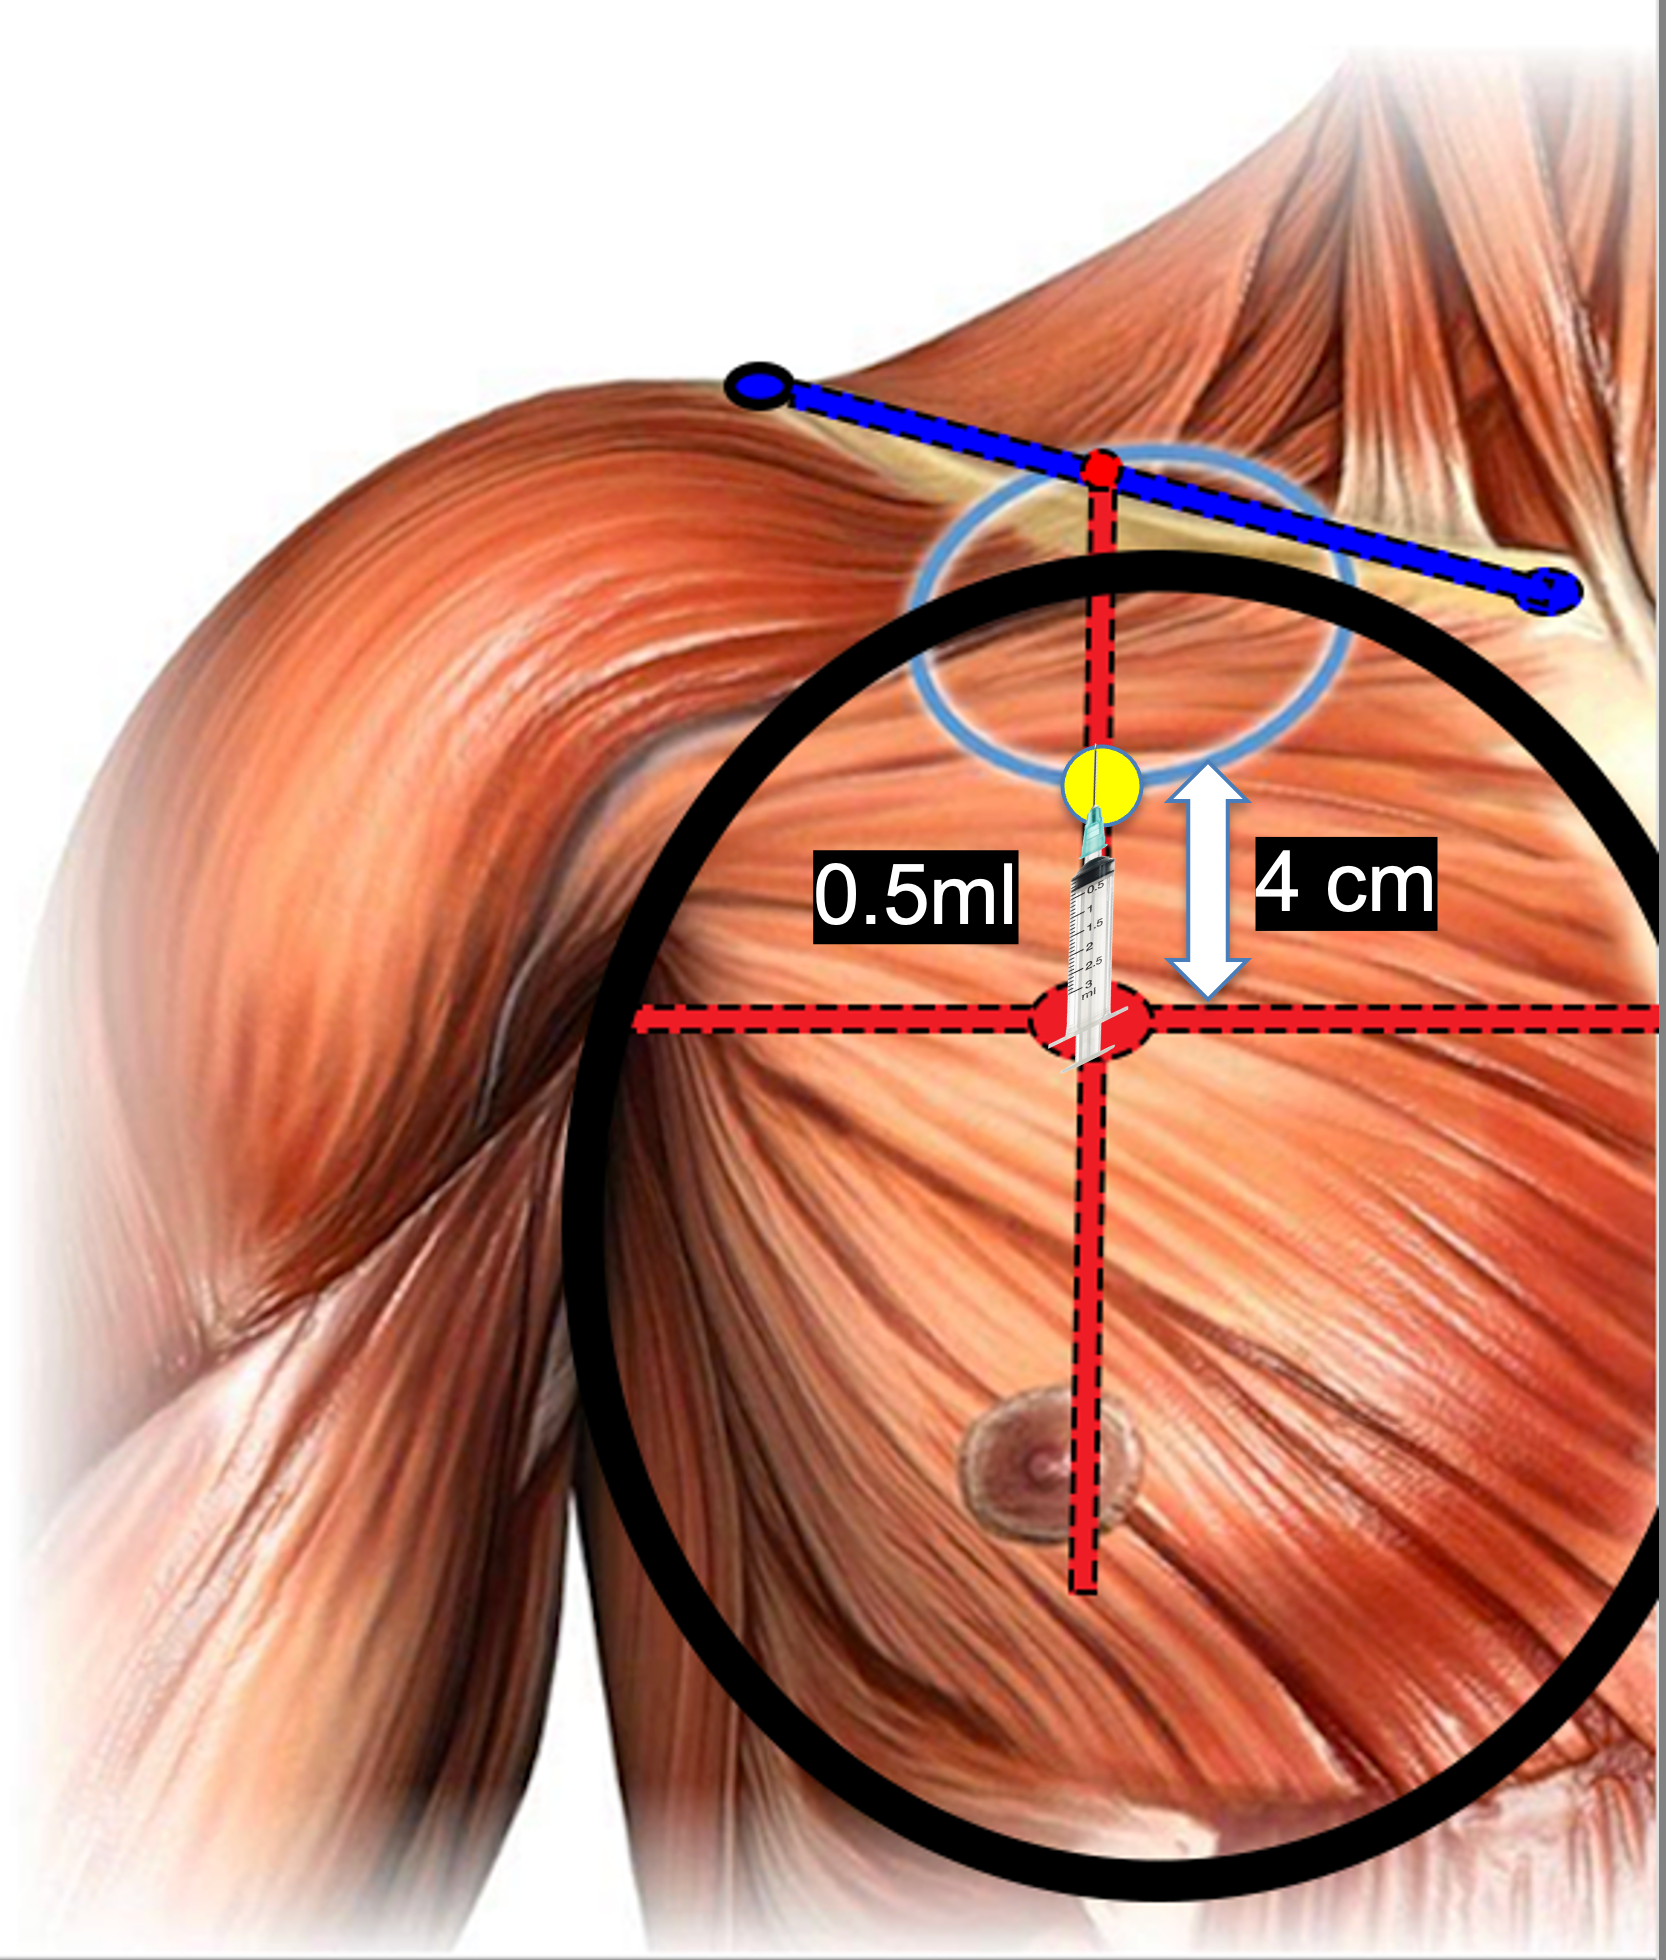
Step 12- Tensor of new maximum projection point
-
position the syringe on the red vertical between the 2 maximum projection points
-
push and inject 0.5 ml from the bottom upwards, beginning from the ,,old,, point of maximum projection to the ,,new,, point of maximum projection

Step 13 : Lateral Tensors of M.Tiziani
-
This procedure has to be done with patient in orthostatic position
-
before injecting, always position the syringe and simulate the injection to check if the pectoral area is lifted
-
2 tensors with 0.5 ml/tensor are applied
-
Those 2 tensors are mostly vertical going from downwards to upwards. They are mostly applied over the latissimus dorsi avoiding the axillary hollow.
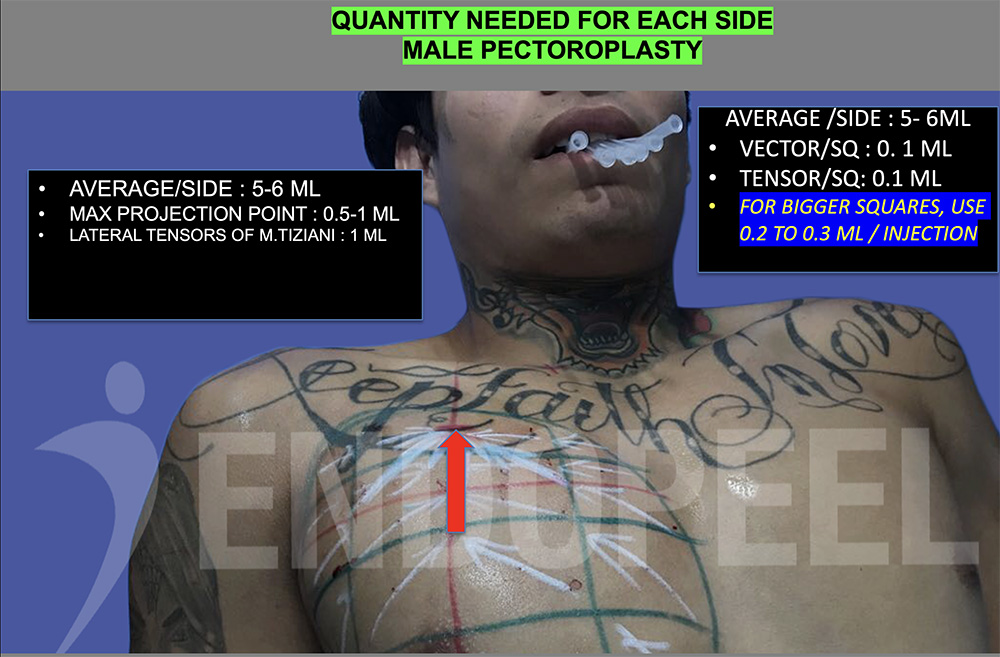
Step 14- Quantities to inject per side
-
0.1 ml to max 0.3 ml per square per vector
-
0.1 ml to max 0.3 ml per square per tensor
-
0.5 ml to max 1 ml from the ,,old,, point of maximum projection to the ,,new,, point of maximum projection ( red arrow)
-
2x 0.5 ml per each lateral tensor of M.TIZIANI
